Table of Contents
YouTube’s Automatic Transcription Tool
There are many ways to add subtitles to videos, and these can depend on the channel you are broadcasting on (online platforms, media players, cinema, etc.) and why you are broadcasting: whether the video is for professional purposes or otherwise.
YouTube is one of the most widely-used channels on the internet. It allows subtitles to be added both manually and automatically. It has a feature that embeds subtitles in a video the instant playback starts. YouTube recognises audio and turns it into text. Simple and useful. However, there are some drawbacks:
- this only works for the video’s original language. If you want to release your product in another language, the content will need to be translated;
- only speech in the video will be translated. However, sometimes you will need to represent ambient sounds with subtitles too, as they can be important to plot coherence, especially for hearing-impaired audiences.
- using this feature is not recommended for long videos or for ones with poor quality audio
- it is not available in all languages
- it is an automatic system, so transcription mistakes are common.
Once the automatic transcription is finished, YouTube will let you edit or delete the transcription.
The YouTube voice recognition tool also makes a lot of mistakes, so it is often better to transcribe the video by hand. As an example, here is a video by Lavazza posted on the same company’s channel, which shows how far from perfect the feature still is.

How do I translate subtitles on YouTube?
There are three ways to translate YouTube video subtitles:
-
direct translation by the account holder (either manually or by uploading a file in a compatible format)
-
translation made by an outside professional;
-
translation made by the community.
Of course, all possibilities have different pros and cons in terms of cost and quality.
The first option would appear to be cost free, though realistically it corresponds to the time spent on it by whoever is translating.
In the second case, on the other hand, we rely on qualified personnel, who guarantee the quality of the work, both in terms of translation and the rightness of the subtitling, which requires important technical skills.
As for the third option, it was there until September 27, 2020: you would allow the YouTube community to make subtitles for free.
Subtitles need to be edited professionally
Subtitles are key to increasing audience engagement, because they improve video accessibility and ensure search engine indexing, which results in better search-result positioning.
The type of subtitles used can vary depending on the broadcasting channel, and on who is involved in the subtitling process as a whole. This is a huge, diverse sector that requires a high degree of professionalism.
Two ways to subtitle videos: With YouTube, and with FAB Subtitler
In the following sections we will look at how to add subtitles to a video using one of the most used channels, YouTube, and using FAB Subtitler, a professional subtitling programme. We will compare the two and try to discern what advantages each solution has over the other. To do so, we will use the subtitles for an Italian advert that became one of the most talked-about and successful of recent years: The Asteroid* by Buondì Motta!
*) For the sake of precision and as linguists, we should point out that asteroids rarely fall to Earth. The advertiser was probably talking about a meteorite.

Embedding subtitles with YouTube
YouTube allows you to create subtitles from scratch or edit any drafts made by community members (if this option is active). The process of embedding subtitles from scratch involves:
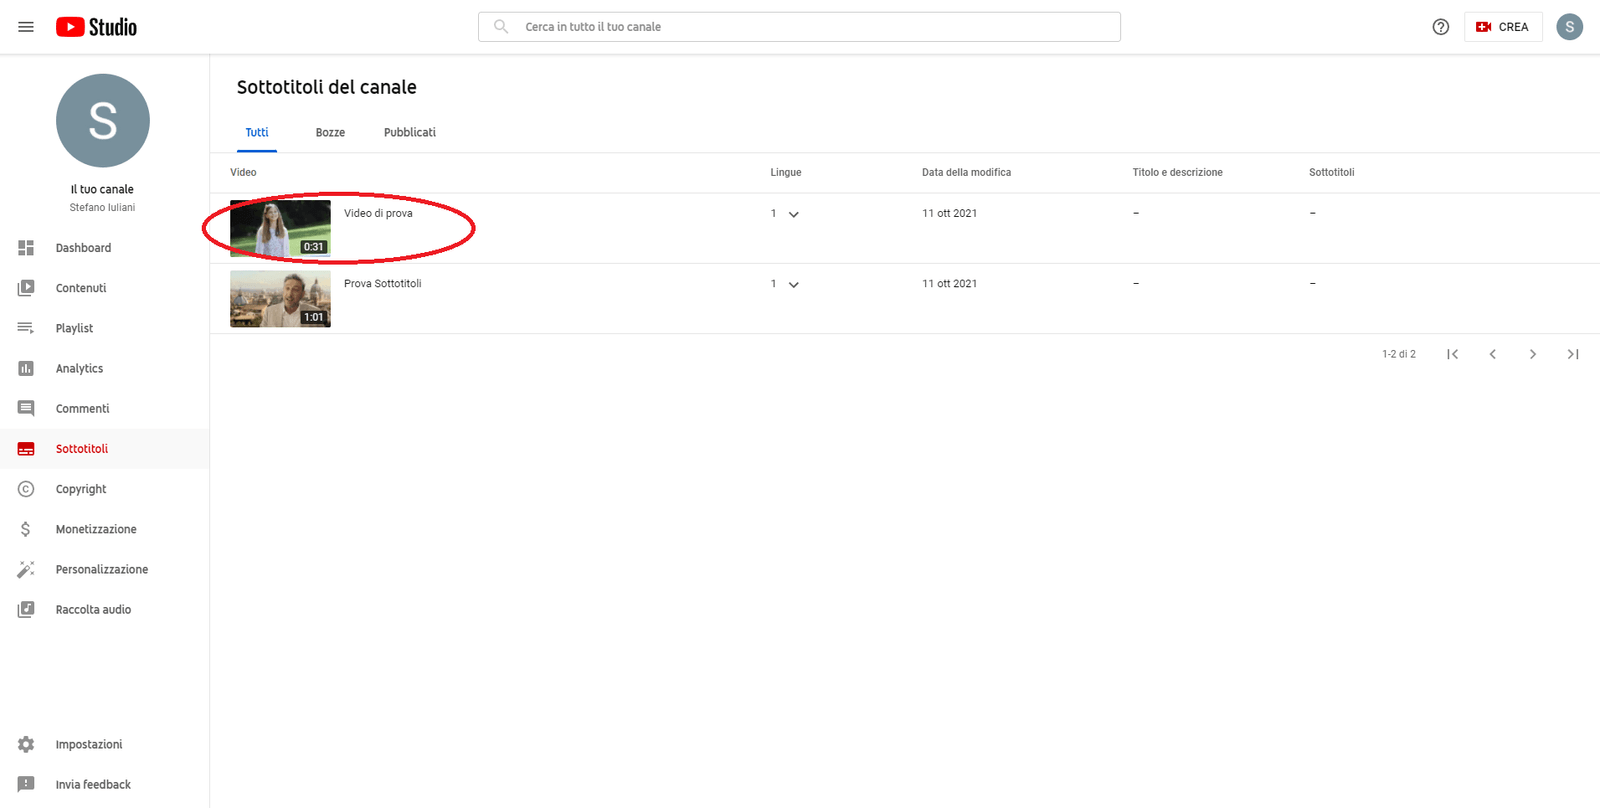
1. Go to the "YouTube Studio" section by clicking on your account in the upper right corner.

2. Go to "Subtitles".

3. Click on the preview of the video you'd like to edit.
4. Click on "Add Language" in the upper right corner.
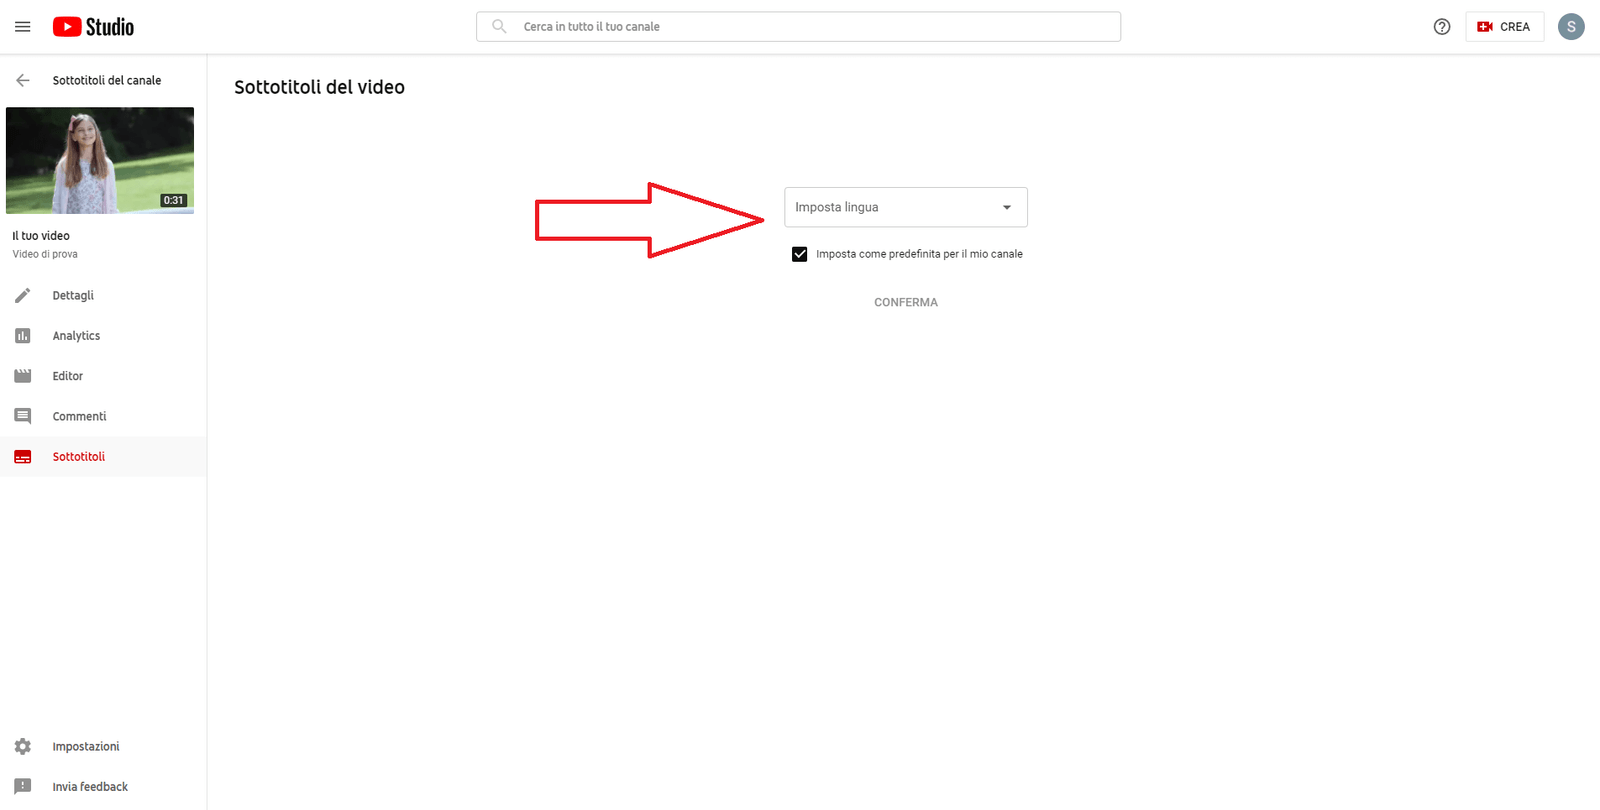
5. Choose the language of the subtitles to be embedded and click "Done".

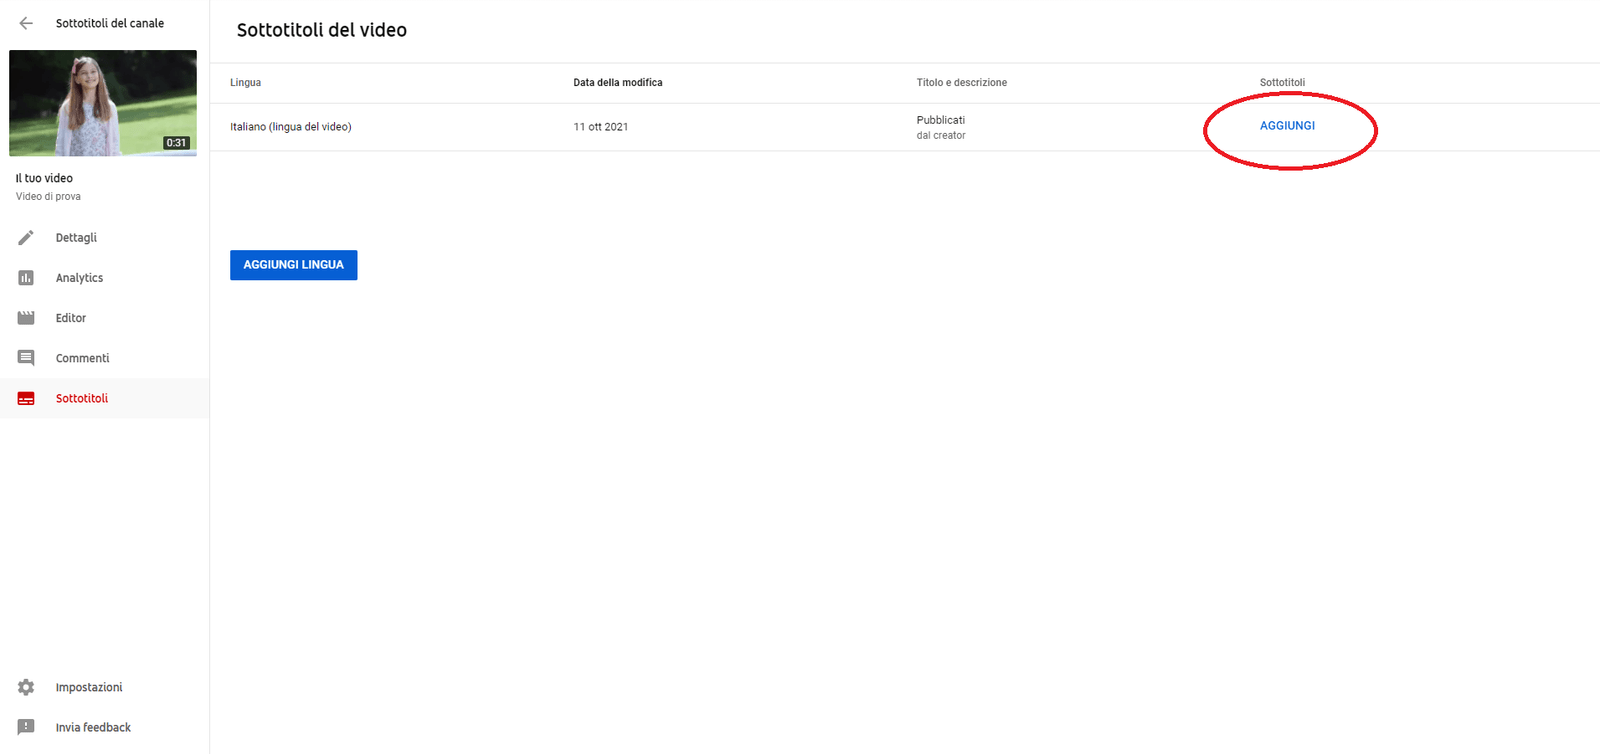
6. Click "Add" in the upper right hand corner.
7. Click "Type manually."

8. Play the video.
9. When you reach the point in the video where you want to add a subtitle, type the text into the box.
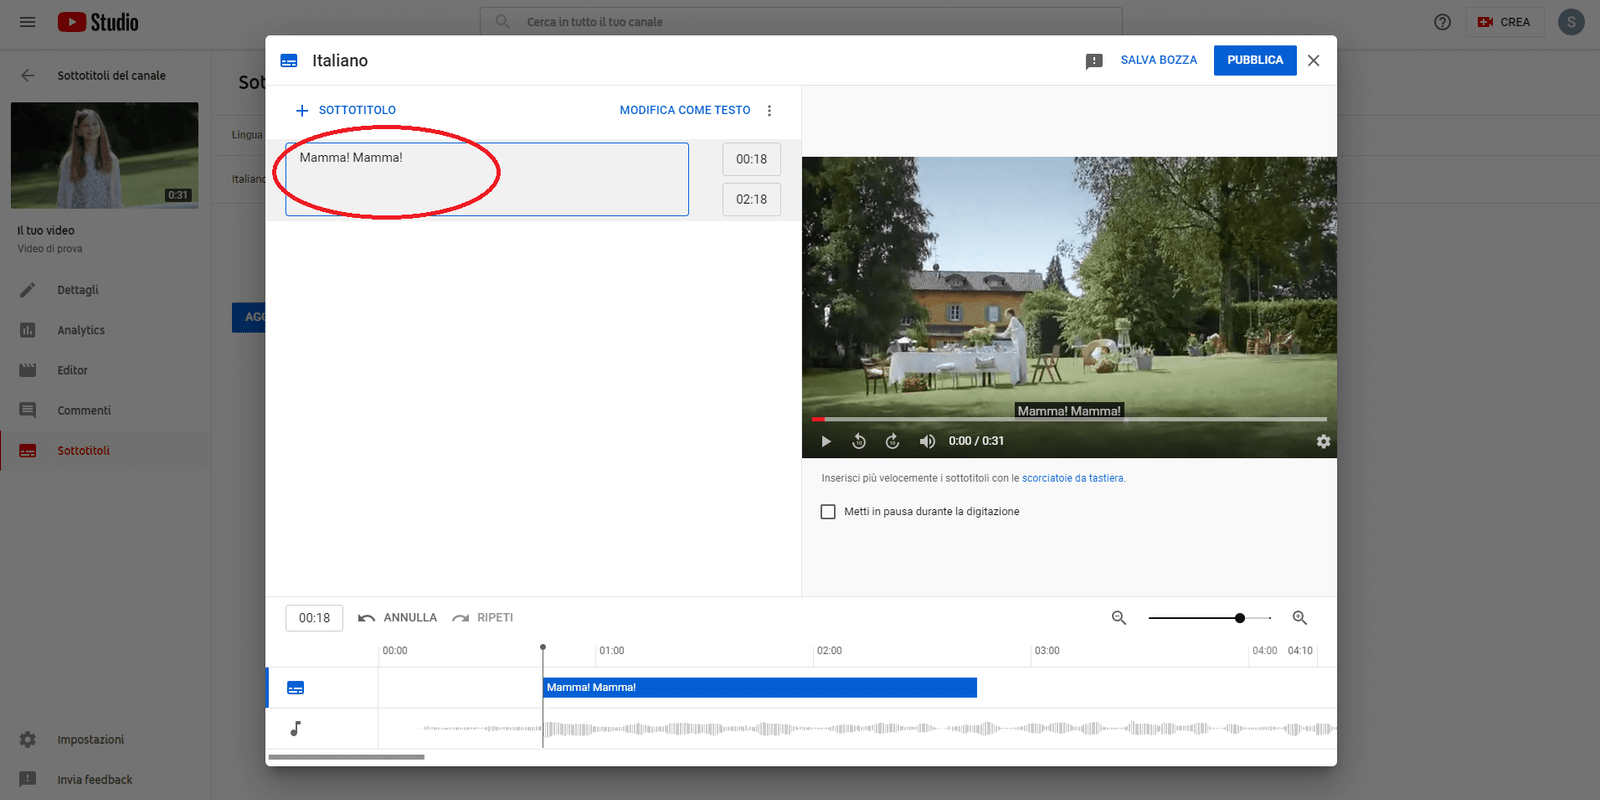
Do not forget to add descriptions of ambient sounds and sound effects as well. This last point is very important for the overall plot of a video. For example, it is possible to add sounds like applause or a car horn like so: [applause] or [car horn] so that users get all the relevant information. This data is especially important for deaf viewers.
The sound of a video does not always correspond to the images shown, but often signal off-screen elements. Just imagine the classic horror film sequence with the sound of a door creaking open, where we see the character’s facial expression and not the door. The creaking sound adds to the growing suspense, and therefore needs to be represented, especially for users who are not able to hear it.
10. If necessary, the start point and end point of a subtitle can be configured by dragging the borders around the text under the video. Once you have finished the subtitle, press Enter.

11. Repeat this step for all the subtitles you want to add. If you want to finish the job later on, changes are saved as drafts that can be resumed whenever you want. Be careful: to start a new line within the same subtitle you must press "Ctrl + Enter".

12. When you have completed all the subtitles, click "Publish".

FAB Subtitler STD
FAB Subtitler is one of the best subtitling programs available on the market. It is professional software, only compatible with Windows, and it is not free. The programme works with all types of subtitles: open, teletext, DVB, subtitles for the deaf, subtitles for online broadcasting, subtitles for cinema, subtitles for DVD and Blu-ray.
There are various versions of the software available, depending on the sector it is needed for. Here we will cover the standard version (STD), which is useful for writing, importing and exporting subtitles in over 70 different formats. This software can open most video file formats, but for best performance, try to work with MPEG1, WMV, MXF e MOV/MP4 file types as much as possible. Other video file types can work too, but it depends on the codec installed on the computer. The supported file formats for import/export are the following:
- DOC, DOCX, STL, CHK, PAC, RAC, 890, TIT, HVH files
- bitmap and text files for DVD, bitmap files for Blu-ray
- Digital cinema files (DCIM, XML, PNG, SMPTE)
- Bitmap file (BMP, PNG)
- XML files (DFXP, EBU-TT-D, Netflix)
- And many more, over 70 in total.
Embedding subtitles with FAB Subtitler
-
Click File > New.

-
Click Video > Open video file, then choose the video you want to edit.
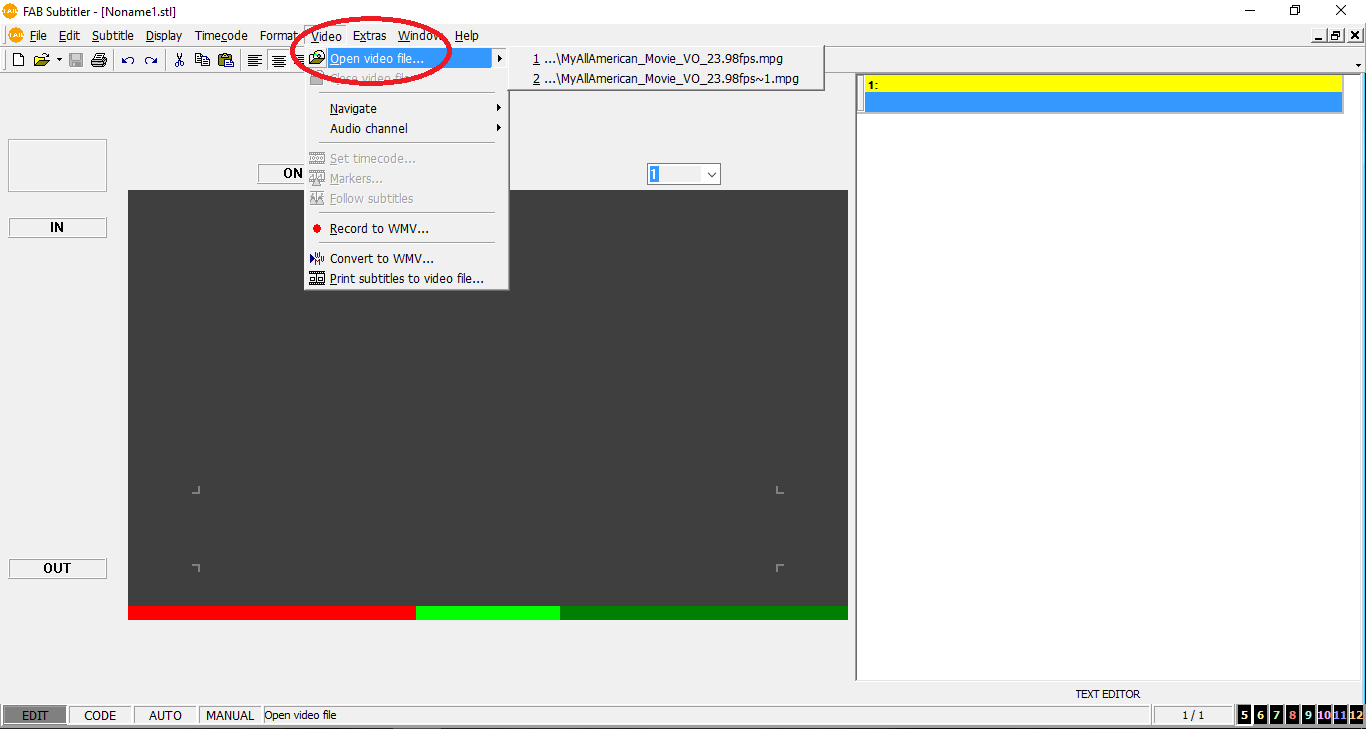
Once the video is open, go to insert subtitles. To do this, it is important to learn the software’s main commands, which can also be customised.
Here is an example. If you want to configure the IN and OUT commands, which correspond to points on the timeline where a subtitle begins and ends, click on Extras > Options.
It may be practical to configure the IN command with the shortcut
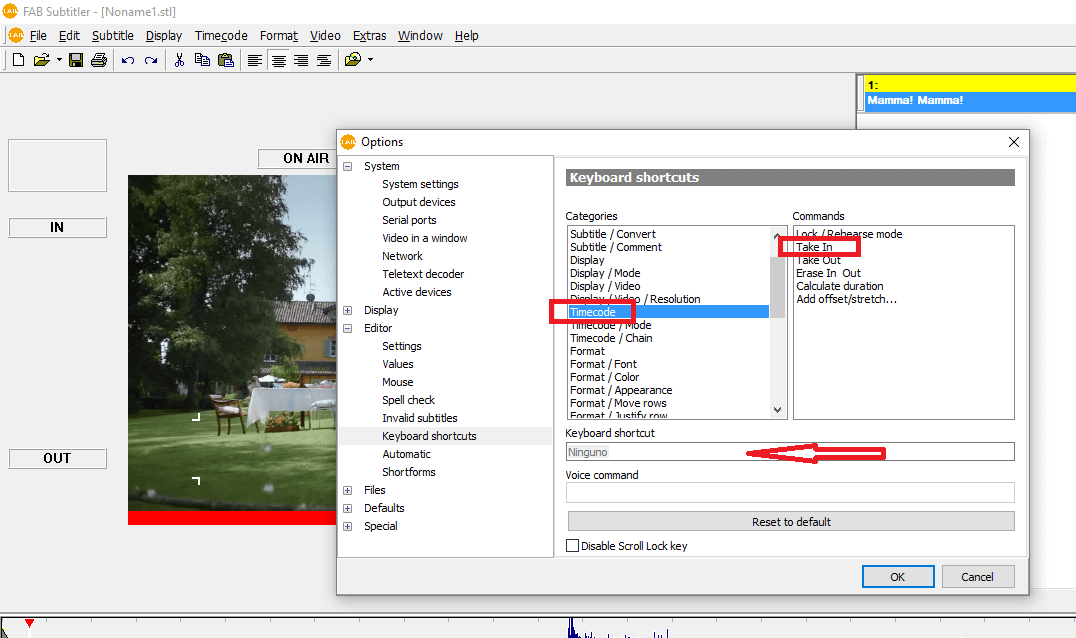
CTRL + Iand the OUT command withCTRL + O. To configure these commands, click Editor > Keyboard shortcuts on the options menu. -
At this point, click on Timecode > Take in, then type
CTRL + Iinto the box with the arrow.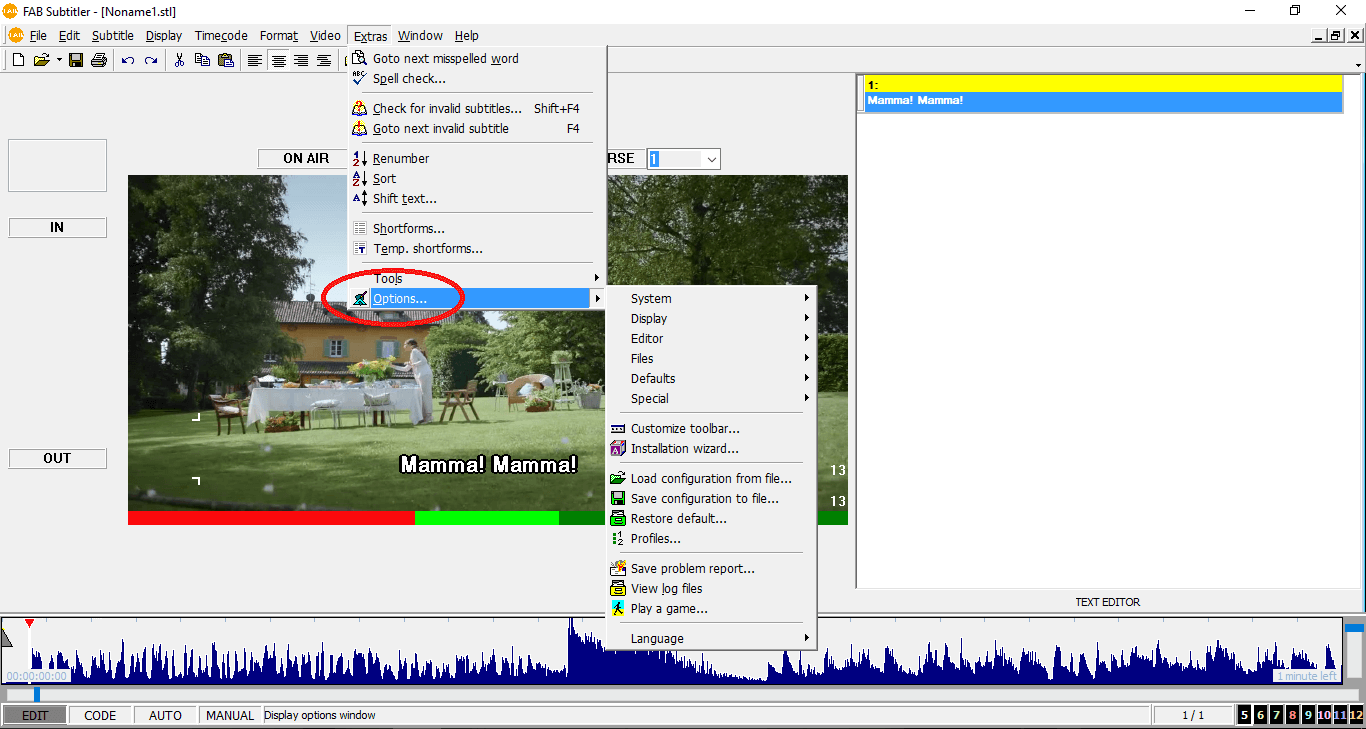
-
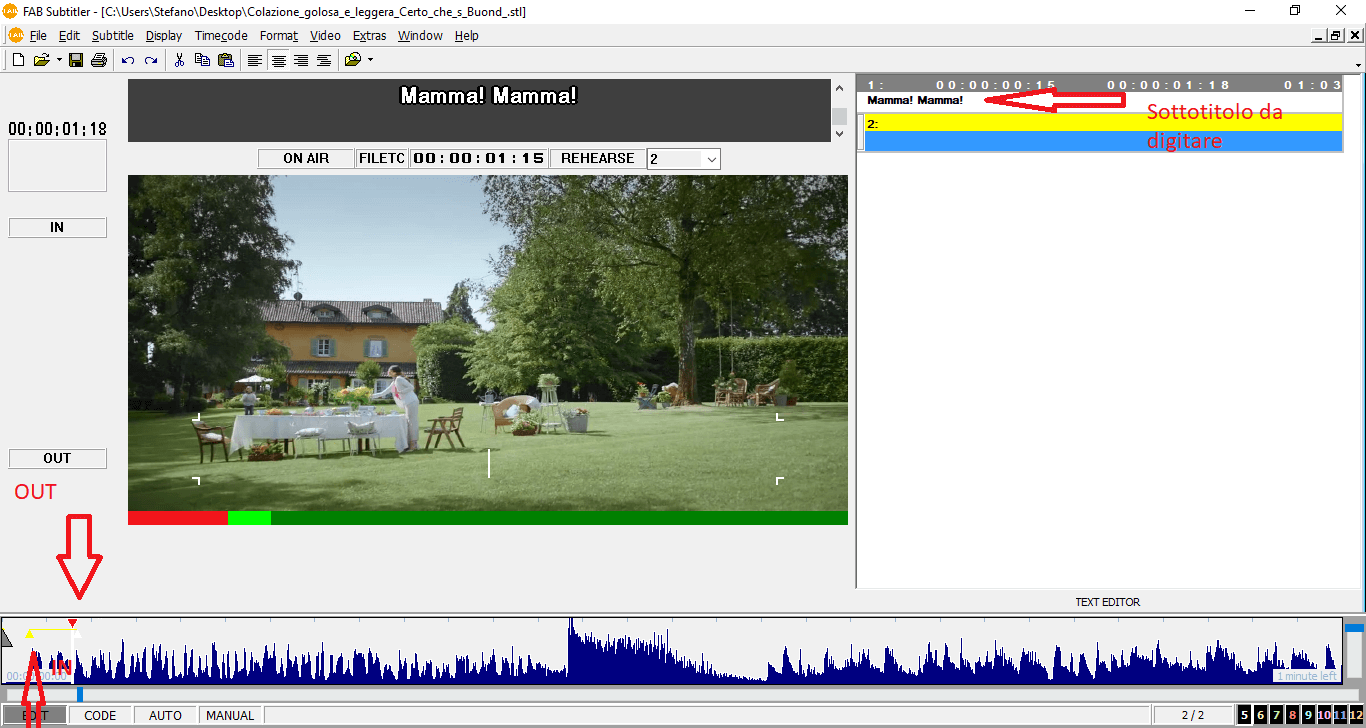
Do the same for the OUT command. At this point, you can begin inserting subtitles. Press
CTRL + Iat the point on the timeline where you want the subtitle to start. Then type the subtitle in and pressCTRL + OUTon the point of the timeline where you want the subtitle to end.
-
Repeat this right up to the last subtitle. Here are some other very useful predefined command configurations:
- Play/Stop video: key 4 on the numeric keypad
- 1 frame forward/reverse: keys 7 and 8 on the numeric keypad
- 1 second forward/reverse: keys 1 and 2 on the numeric keypad
-
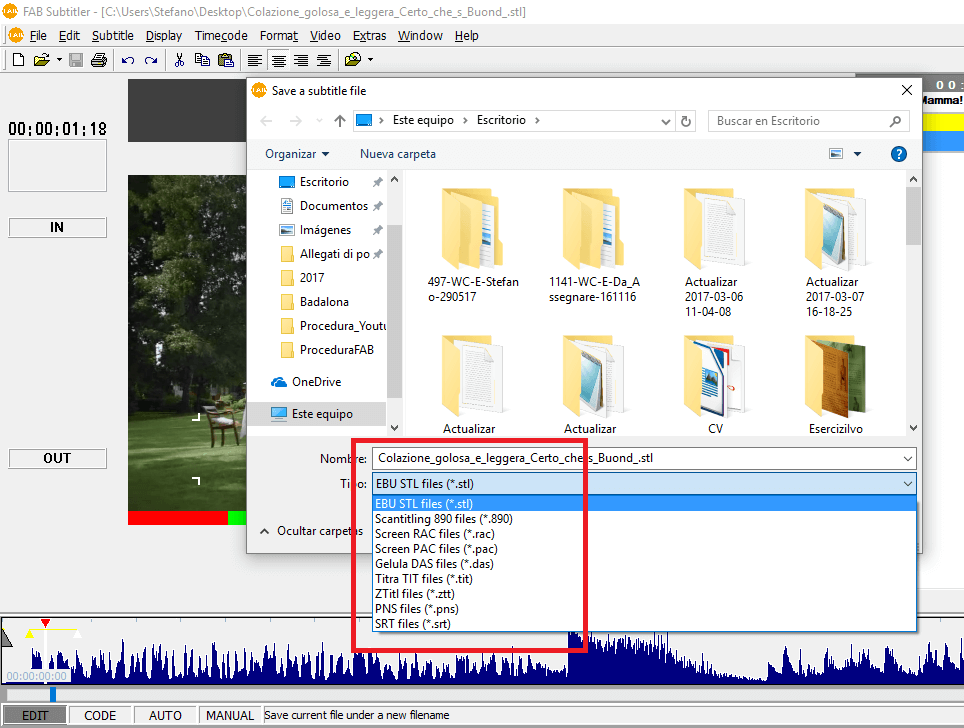
Once you have inserted all the subtitles, the file is exported based on the desired format. Click File > Save as. Now the window with all the available formats will appear. Choose the desired format.
Conclusions
YouTube is of course one of the most-used channels on the internet. Therefore, uploading a video to YouTube can be a great choice, as it can reach a very wide audience. However, this does not mean that YouTube subtitles will be your best option. Quite the opposite. It is an inaccurate, unprofessional tool with limited capabilities.
Although FAB Subtitler, like all professional subtitling software, is a more expensive choice, but far superior in terms of quality. Its features are much more thorough and efficient than YouTube’s tool. And if that’s not true, then may an asteroid strike me down!
Need help subtitling your videos? contact us for a non-binding quote.